Overview
Triggers initiate automatic events, like sending recipients an autoresponder email, subscribing contacts to a list, or removing a contact from all other autoresponders. Triggers can be initiated by things like a contact subscribing to a list, unsubscribing, reading or clicking on a message, or even sending a reply to an SMS.
For example, if you have an RSVP link in your mailer, you can create a trigger to automatically send a confirmation mail to everyone who clicks the link.
IMPORTANT:
The only way for triggers to work is when a subscriber joins a list via a subscription form or via API – not via a manual upload. This is to safeguard the email account holder from receiving content or auto-response messages that they didn’t initiate themselves. If you’d like to trigger a message from a list that includes manual uploads, rather create a workflow.
Triggers aren’t automatic for contacts coming in via API and need to be built into the API call. Set the property “create_notifications” to “yes” in the API call for it to work successfully.
How to Create a Trigger
To create a trigger:
- Hover over the lightning icon in the left-hand navigation bar and click on Set Up Triggers. This will take you to the Triggers dashboard.
- Click on New in the Action Bar in the top right of the screen.
- In the Properties tab, give the trigger a name, description and set the status of the trigger to on (active) or off (inactive).
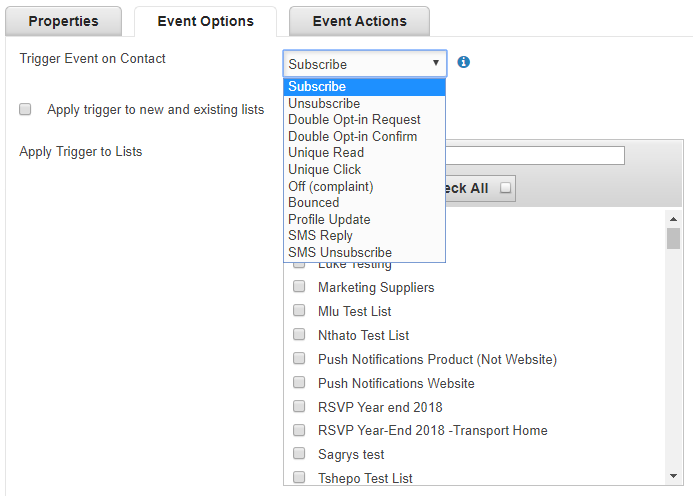
- Click on the Event Options tab to set the action that will trigger your event.
- Select your trigger event from the drop-down list and check the checkbox of the contact list that you’d like the trigger to apply to.

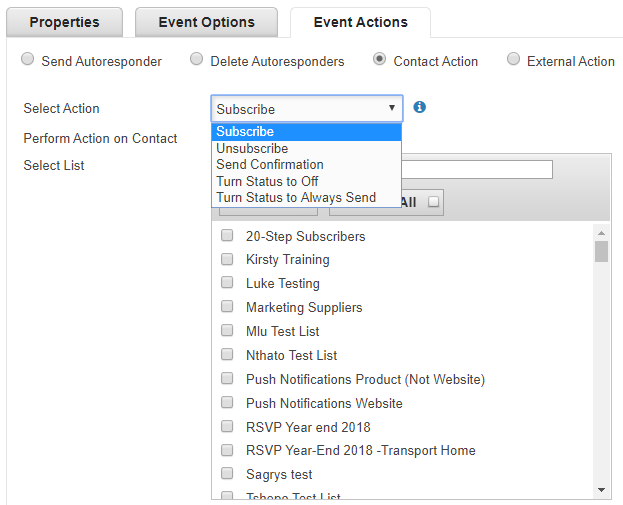
- Click on the Event Actions tab to specify what you’d like to happen when the trigger is pulled. The available event actions include:
- Send Autoresponder: Click on the Send Autoresponder radio button and use the drop-down menu to select which autoresponder you want to send. Set the required time that you’d like to pass after the trigger is pulled for the autoresponder to be sent.
-
- Delete Autoresponders: You can choose to delete an autoresponder when a contact unsubscribes or complains. They will not receive responses after this.
- Contact Action: Use this function if you’d like to update the status of the contact. Click the Contact Action radio button and:
- Choose the action from the drop-down list. The options include:
- Subscribe
- Unsubscribe
- Send confirmation
- Change a contact’s status to ‘Off’
- Change a contact’s status to ‘Always Send’
- Specify if you’d like the change to be applied to the contact’s email or mobile status using the Perform Action on Contact drop-down list.
- Select which list/s you’d like the action to apply to.
- Choose the action from the drop-down list. The options include:

-
- External Action: Use this function to collect data about your contact’s activity on your own systems. When the client triggers the external action, it accesses a URL that contains data you set up using the personalisation tags. To do this, paste the URL in the text box and apply personalisation tags to the link by clicking the Personalise Link button below it.
- When you’ve finished creating your trigger, click the Save button in the action bar in the top right of the screen.
Trigger Preview
Preview your existing triggers on the Triggers dashboard. Existing triggers are shown on the left. When you click the trigger’s name, the preview will show on the right. The preview shows the trigger’s properties and an event log of the activity on the trigger and the contacts who performed those actions.

