Overview
Transactional SMSs are sent once-off, automatically, to individual contacts, based on an action. They’re useful for sending one-time pins, ecommerce notifications, or online-banking login alerts.
How to Create a Transactional SMS
You can only create transactional SMSs using the API. Please read our API documentation on this for details on how to do this.
Reporting & Admin
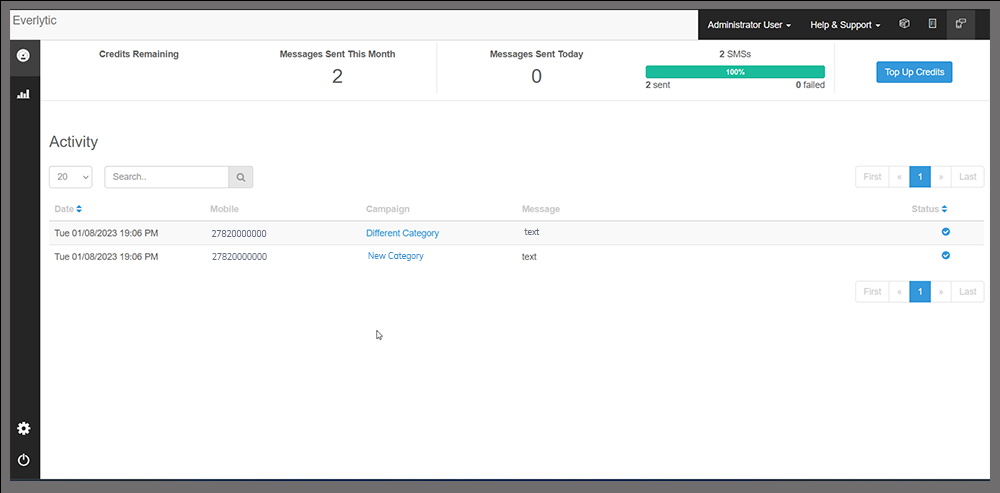
To access reports on transactional SMS, click the Transactional SMS button in the top right of the screen.
This dashboard shows you all the transactional SMSs you’ve sent, an overview of messages sent and failed, and the balance of your SMS credits. You can top-up your SMS quota using the Top Up Credits button on the dashboard, or via the accounts section.
API Key
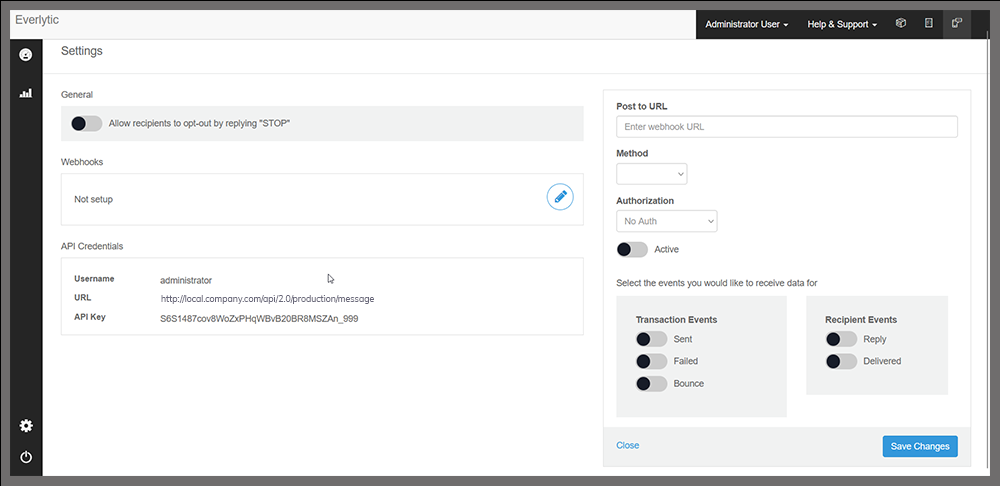
If you’re going to use Transactional SMSs, you must change your API key for all existing API calls. You’ll see this new API key displayed on the left-hand side of the Settings page in the Transactional SMS dashboard (see section below for more info).
Configuring Webhooks on Transactional SMS
Webhooks allow our system to automatically notify your server when certain events happen, for example, when a transactional email gets delivered. After a webhook is invoked, it sends a message with information about the event to your specified URL.
To set up webhooks on Transactional SMS, do the following:
- Navigate to the Transactional SMS Dashboard and click on the gear icon at the bottom-left of your screen.

- The Settings page will appear (see image below for reference).

- First, enable recipient opt-outs by toggling the Allow recipients to opt-out by replying “STOP” setting to green. We highly recommend you do this to remain data privacy compliant in your SMS messaging.

- Next, click on the pencil icon in the Webhooks
![]()
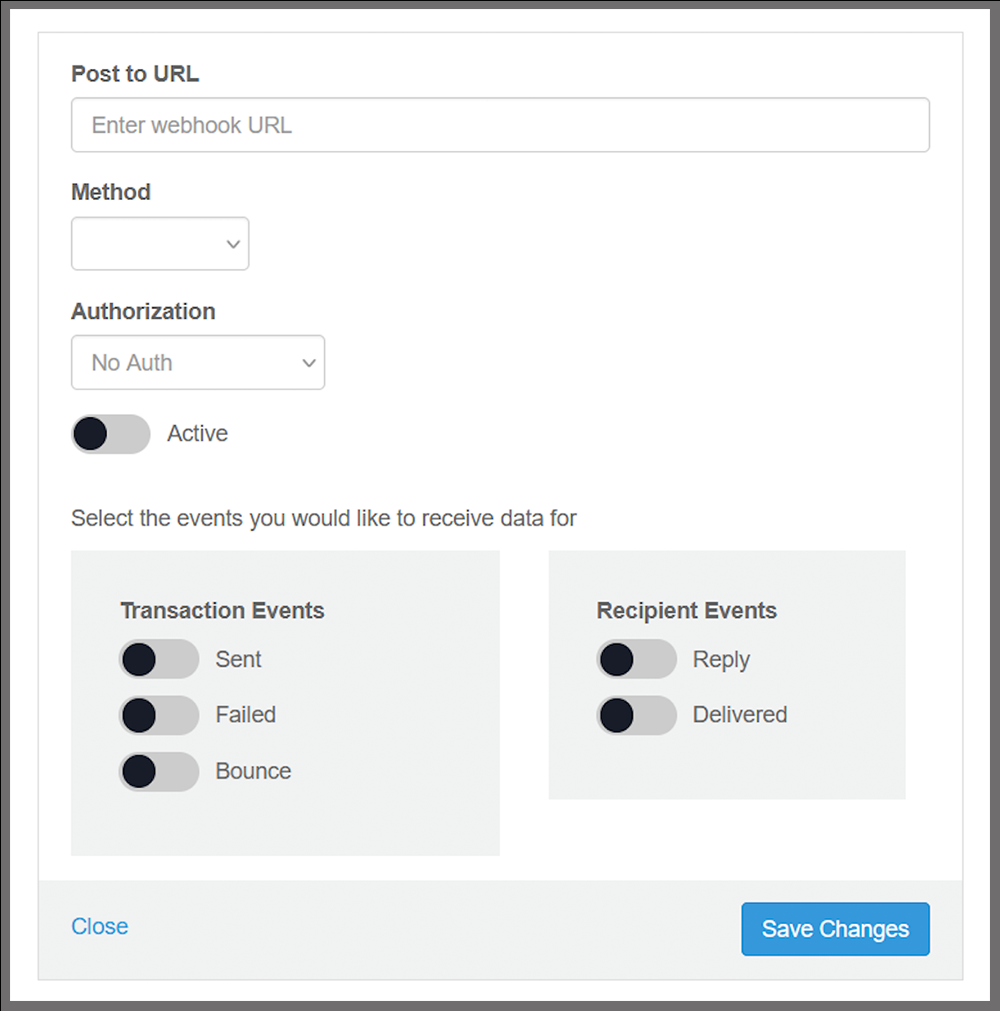
- This will bring up the setup interface on the right side of the Settings.

- Insert your webhook URL in the Post to URL
- Specify the request type you will use in the webhook. There are two options:
- POST
- GET
- Choose your authorisation type. You can choose from:
- Basic authorisation
- No authorisation
- If you select Basic authorisation, then you will need to set an authorisation username and password before proceeding.
- At this point, you can switch on the webhook by moving the Active toggle to green.

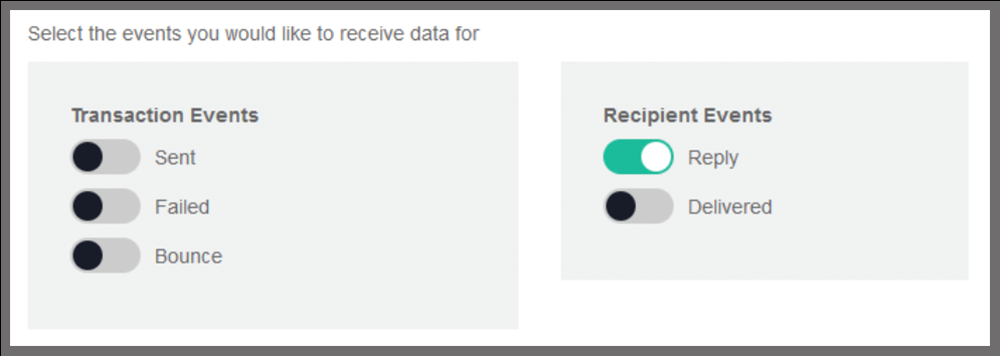
- Next, select which events your webhook will send requests on by moving the toggle next to each event type to green. There are two main event classes you can choose from.
- Transactional Events:
- Sent
- Failed
- Bounce
- Recipient Events:
- Replied
- Delivered
- Transactional Events:

- The status of your webhook will display in the Webhook pane to the left of the setup interface, as well as any events you’ve added to the webhook.

- Lastly, click the Save Changes button.

Below are three examples of possible data payloads you can receive when your webhook is set up.
Sent / Failed / Delivered
  {
  "id": "44bc4ec2-724d-4f9e-a9da-f521f79c733f",
  "type": "sent",
  "timestamp": "2022-10-17T13:48:52.271Z",
  "data": {
    "transaction": {
      "id": "e3772906-56ec-45f0-98ea-33784970808a",
      "custom_id": "TrackingId042",
      "campaign": {
        "name": "Group: October 2022"
      },
      "sent_timestamp": "2022-10-17T13:01:00.000Z",
      "recipient": {
        "mobile_number": "+27836255042"
      }
    }
  }
Bounce
  {
  "id": "44bc4ec2-724d-4f9e-a9da-f521f79c733f",
  "type": "bounce",
  "timestamp": "2022-10-17T13:48:52.271Z",
  "data": {
    "transaction": {
      "id": "e3772906-56ec-45f0-98ea-33784970808a",
      "custom_id": "TrackingId042",
      "campaign": {
        "name": "Group: October 2022"
      },
      "sent_timestamp": "2022-10-17T13:01:00.000Z",
      "recipient": {
        "mobile_number": "+27836255042"
      },
	  "bounce": {
		"type" : "hard",
		"message": "Reply 42-4",
		"received_timestamp":"2022-07-14T11:28:09+02:00"
	  }
    }
  }
Reply
  {
  "id": "44bc4ec2-724d-4f9e-a9da-f521f79c733f",
  "type": "reply",
  "timestamp": "2022-10-17T13:48:52.271Z",
  "data": {
    "transaction": {
      "id": "e3772906-56ec-45f0-98ea-33784970808a",
      "custom_id": "TrackingId042",
      "campaign": {
        "name": "Group: October 2022"
      },
      "sent_timestamp": "2022-10-17T13:01:00.000Z",
      "recipient": {
        "mobile_number": "+27836255042"
      },
	  "reply": {
		"content" => "reply content",
        "received_timestamp": "2022-10-17T13:01:00.000Z",
	  }
    }
  }
Note:
Some important items in the payload include:
- custom_id: the custom ID that was used when sending the transaction
- type: the type of event, which can be one of five options, i.e., ‘reply’, ‘sent’, ‘failed’, ‘bounce’, ‘delivered’
Additional items specific to bounce payloads include:
- type: bounce type, whether ‘hard’ or ‘soft’
- message: bounce message received from the SMS provider
Additional items specific to reply payloads include:
- content: the content of the reply received from the recipient
- received_timestamp: the date and time that the recipient sent the reply

