
Overview
Workflows are automated communication journeys that you can customise according to contact data, field changes, message engagement, and more.
How to Create a Workflow
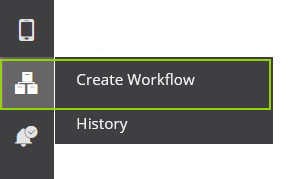
To create a Workflow, hover over the Workflows icon in the left navigation and click Create Workflow.
Then:
- Step 1: Workflow Properties – Enter the basic properties of your workflow
- Step 2: The Workflow Builder – Create your workflow
- Step 3: List Selection – Select which lists you’d like this workflow to apply to
- Step 4: Workflow Settings – Choose when to send workflow messages to contacts
- Step 5: Confirmation – Double-check the settings for your workflow and launch
Step 1: Workflow Properties
Enter the basic properties of your workflow in the form.
| Property | Description |
|---|---|
| Name | The name of your Workflow. Recipients won’t see this. |
| Description | A short description of the workflow. Not visible to workflow recipients. |
| From Name | The name that you’d like your subscribers to see when they receive your message in their inbox. |
| From Email | This is what your subscribers will see as the ‘From’ address in their inbox. |
When you’re ready, click Next.
Step 2: The Workflow Builder
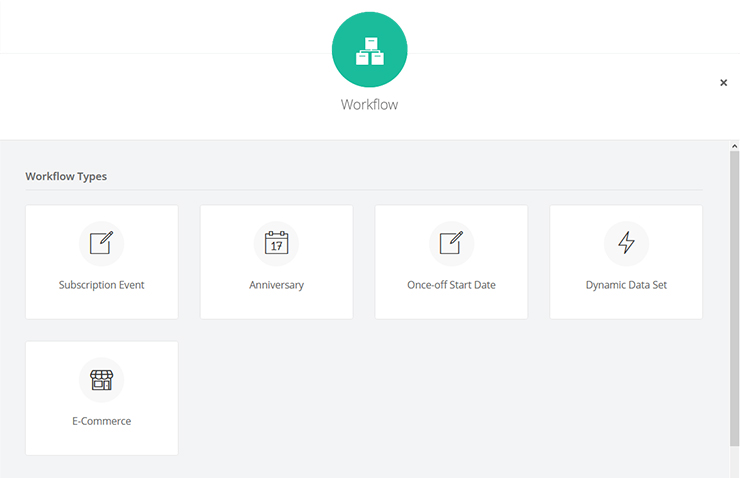
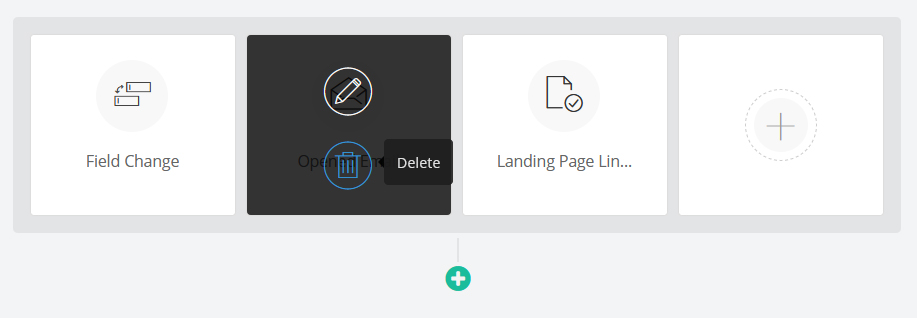
To begin a workflow, click the plus button and select EITHER A) a workflow type, or B) a start trigger that best suits the journey you want to create. The current options include:
A) Workflow Types:
Workflow types can only have one start trigger.
- Subscription Event: Triggers the workflow when a contact is subscribed to a list
- Anniversary: Triggers the workflow before, on, or after a date relevant to each contact (like a birthday or anniversary) using a date field in your list/s
- Once-Off Start Date: Triggers the workflow on a specific date
- Dynamic Data Sets: Triggers the workflow via API and allows contacts to exist in the workflow multiple times, with unique data per entry
- E-Commerce: Triggers the workflow when specific ecommerce events take place, like when an online shopping cart is abandoned
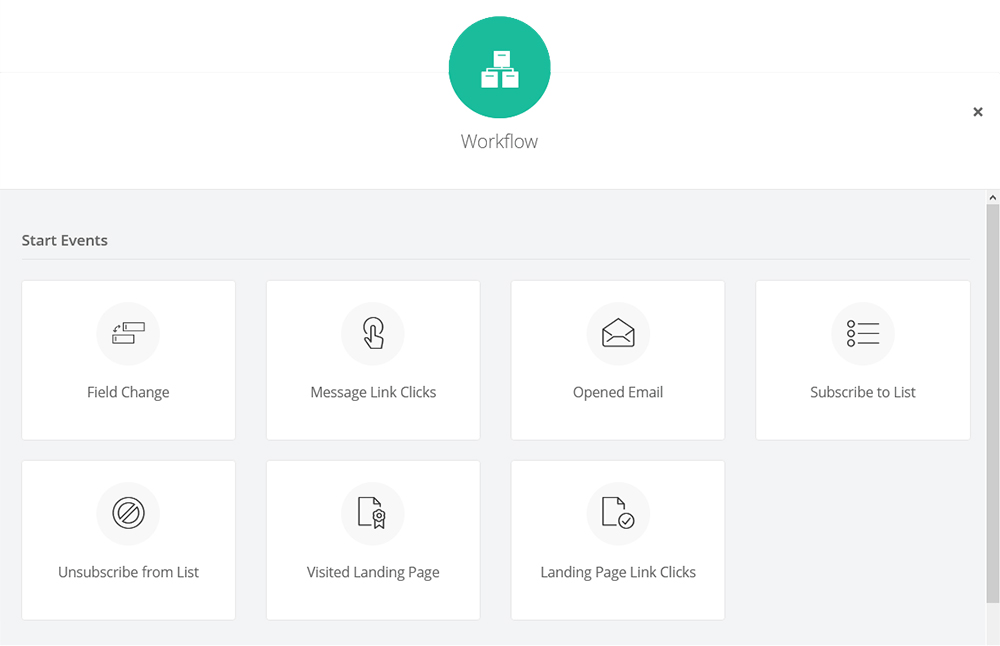
B) Start Events
Start events are tied to Global Triggers and enable you to add up to five triggers to your workflow – so subscribers can enter your workflow in multiple ways.
- Field Change: Triggers the workflow when a contact or custom field (excluding multiple choice fields) is updated
- Message Link Clicks: Triggers the workflow when a contact clicks a link in an email or SMS
- Opened Email: Triggers the workflow when contacts open specific emails
- Subscribe to List: Triggers the workflow when contacts are subscribed to all lists or specific ones that you select
- Unsubscribe from List: Triggers the workflow when contacts unsubscribe from all lists or specific ones that you select
- Visited Landing Page: Triggers the workflow when contacts visit specific landing pages created on our platform
- Landing Page Link Clicks: Triggers the workflow when contacts click on specific links on specific landing pages created on our platform
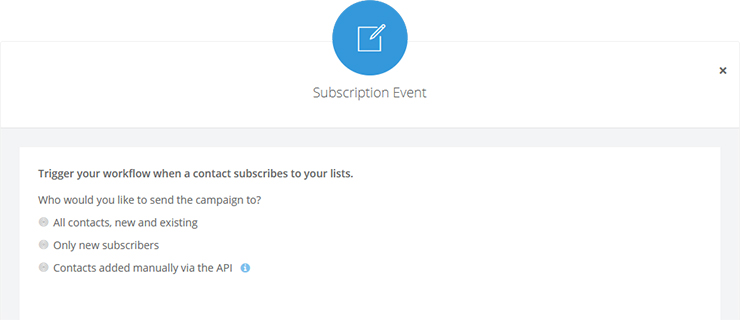
Workflow Type: Subscription Event
This trigger is used when you want a contact to start receiving the messages in this workflow as soon as they’re added / subscribed to your list.
Subscription events can be used on all contacts (new and existing), only new subscribers, or contacts added via API (this ensures that the workflow is fully under your control and never triggers automatically).
It’s perfect for:
- On-boarding campaigns
- Lead nurturing campaigns
- Specific customer sign-up journeys like receiving weekly recipes, tips, etc.
- Exclusive promotions for customers signing up for a new list
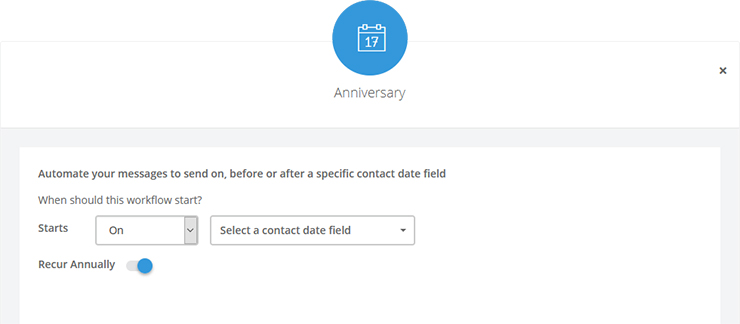
Workflow Type: Anniversary
This triggers the workflow before, on, or after a date relevant to each contact (like a birthday or anniversary) using a date field in your list/s.
You can use this to:
- Offer customers exclusive deals or discounts on their birthdays
- Thank existing subscribers for their loyalty
- Remind customers to renew annual contracts or products
- When setting up this trigger, you can tell the system to start sending your workflow messages on, before, or after the specified annual date
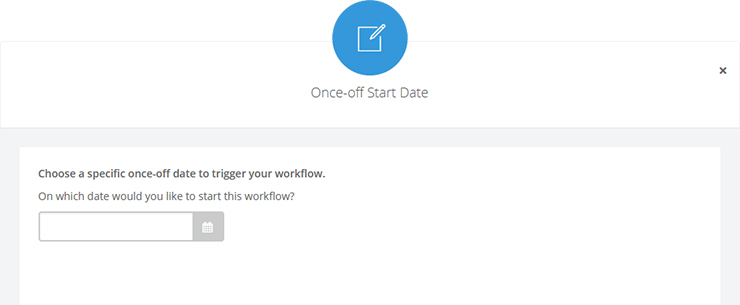
Workflow Type: Once-Off Start Date
This triggers the workflow on a specific date. Messages will be sent to all specified contacts from this selected date.
You can use this trigger to:
- Send reminders and follow-up emails regarding events
- Count down to a website launch with teaser messages
- Run a campaign leading up to a competition
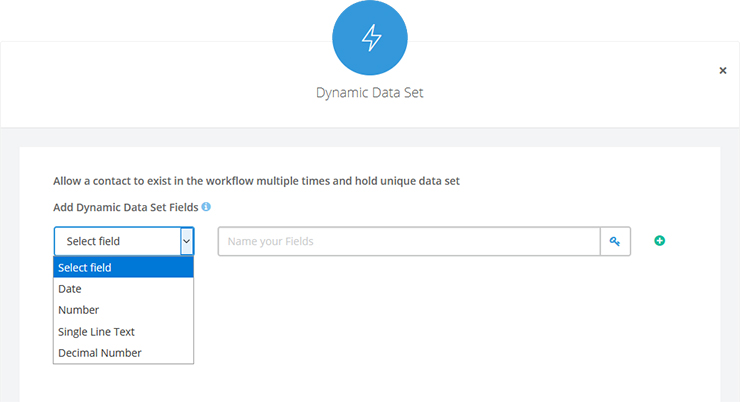
Workflow Type: Dynamic Data Sets
This workflow type can only be triggered via API and allows a contact to exist in the workflow multiple times (you can specify which workflow to add the contacts to in the API), holding unique data per entry.
Dynamic Data Sets Workflow Example
If a contact purchases an aeroplane ticket, they can get added to the workflow and the unique data set fields can be things like flight reservation number and departure date. The contact will then flow through the workflow receiving the necessary information for that data set.
The same contact can then purchase another aeroplane ticket and get added again to the same workflow, but this time with a reservation number and departure date relevant to the new ticket. Both versions of this contact can exist in the same workflow and receive unique emails and SMSs based on each set of unique data.
Use this for license renewals, doctors’ appointments, or any sequence where you can receive similar communications, but the data is specific to the contact at that time.
Before you start, make sure you’ve set up the API by following these instructions:
Then, to set up the Workflow:
- Select the Dynamic Data Sets button from the workflow start modal.
- Specify the types of data (including at least one unique identifier) that will be unique to each entry to the Workflow. These same data sets will need to be included in your API setup. You can add up to four data sets.
- Click Save.
Note:
- These fields need to exist in the API call. If they don’t, the contact won’t be added to the workflow.
- One of your fields must be a Unique Identifier, which will always be required – this will stop the same contact with the same data set coming in twice.
- Data fields are created on the workflow. They’re not tied to the contact, but rather to the workflow itself.
- You can personalise workflow emails and SMSs with the unique data and you can add conditions in the workflow with them too.
- You can’t re-create a data sets workflow.
Workflow Type: E-Commerce
If you’ve integrated your ecommerce site with our platform, you can use the following ecommerce workflow types:
- Abandoned cart: Triggers automated messages to your shoppers when they’ve abandoned their carts or been idle on their carts for an hour.
- Purchase series: Trigger a series of messages when a shopper purchases from your store (e.g.: order confirmation, delivery info, review request, etc)
Once you’ve selected your workflow type, you can add additional criteria to filter the types of contacts you want this series to apply to.

Abandoned Cart Notes:
- If a customer doesn’t exist in your list yet and they abandon a cart or complete a purchase, they’ll be added to the relevant store list on our platform.
- If a workflow contact is on email two of three in an abandoned cart series, and they clear their cart before receiving email three, they will still receive the third email, but the abandoned-cart block will be empty.
- If they update their carts while flowing through the workflow, the next email they get will reflect the updated version of their cart.
Purchase Workflow Notes:
- Personalise your order notification emails with the customer’s specific purchase information using the personalisation feature.
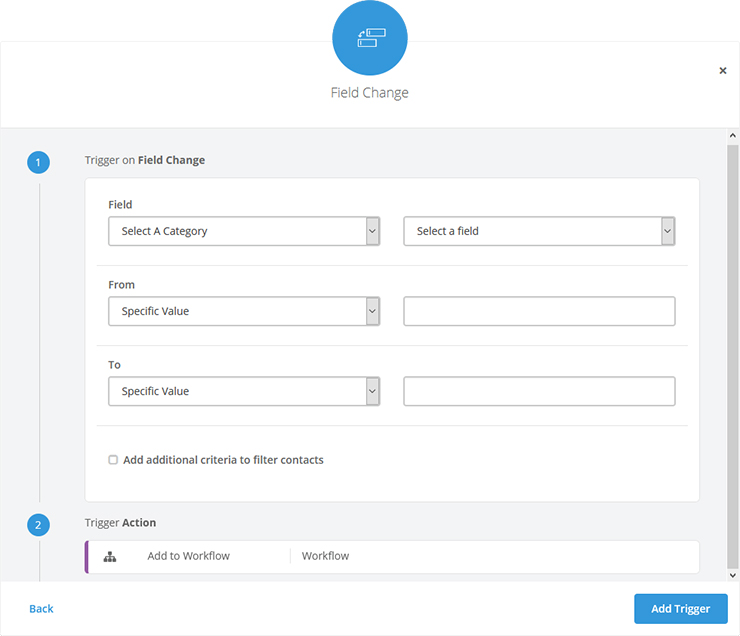
Start Event: Field Change
Use this trigger to add someone to the workflow when a contact or custom field (excluding multiple choice fields) is updated (e.g.: trigger the workflow if a loyalty member’s status changes from silver to gold). You can trigger the workflow if a field changes to or from any value or one that you specify.
The options include changes from:
- A specific value to a specific value
- A specific value to any value
- Any value to a specific value
- Any value to any value
Important note: This type of workflow will automatically send to all new and existing lists. To customise which lists you’d like included, follow the instructions below.
List Selection in Field Change Start Event
You can apply a list filter to a field change trigger to specify the lists that you want included in the trigger. This also allows you to filter on whether the contacts on that list are subscribed or unsubscribed to email and / or SMS.
To do this:
- Click the checkbox to add additional criteria to filter contacts
- Select lists from the category drop-down
- Customise the other drop-downs to your preferences
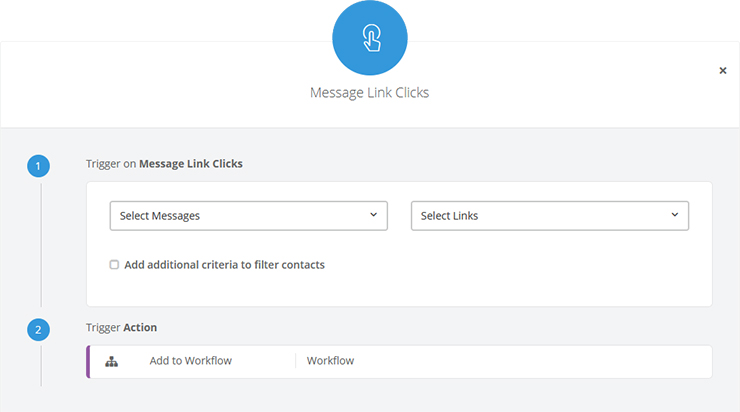
Start Event: Link Clicks
This trigger adds someone to the workflow when a contact clicks a link in an email or SMS. It’s a highly adaptable trigger because you can specify the email / SMS, as well as the exact link within that email / SMS, that you want it to trigger from.
To add a link-click trigger event:
- Select the Link Clicks button from the workflow start modal.
- Select the email or SMS message that the trigger link is in from the drop-down menu.
- Use the Select Links drop-down menu to select the link you’d like to use as the trigger.
Unlike when you create a new trigger on the New Global Triggers dashboard, in workflows the action is already set to enrol the contact to the workflow.
Note:
- If you have the same link in your email multiple times, it will be displayed as one link in the drop down.
- If a contact clicks this URL (anywhere in the email or SMS) they will be added to the workflow.
- This trigger works only on unique click – i.e.: the first time the contact clicks it. It won’t keep adding the contact to the workflow for any subsequent clicks.
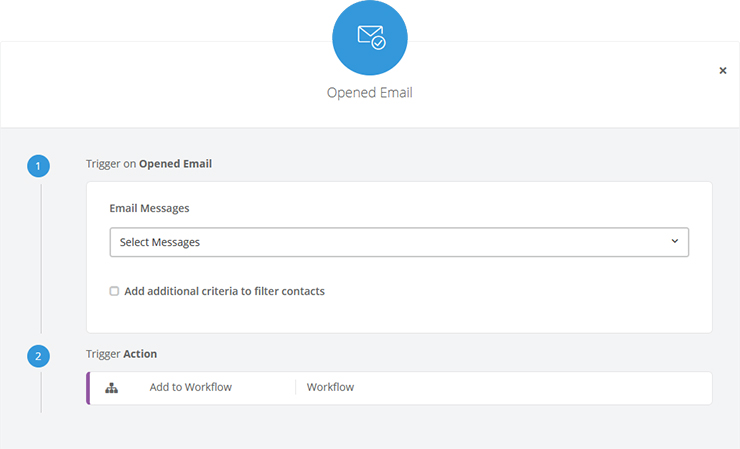
Start Event: Opened Email
This start event adds a contact to a workflow if they open specific emails. To create this start event:
- Select the Opened Email button from the workflow start modal.
- Choose the email/s you’d like contacts to have opened.
- If you’d like to only apply this to certain types of contacts, click the ‘Add additional criteria to filter contacts’ checkbox and specify which types of contacts you’d like to filter this start event by. You can add multiple filters here.
- When you’re finished, click Add Trigger.
Start Event: Subscribe to List
This trigger adds contacts to the workflow when they’re subscribed to all lists or specific ones that you select. It functions similarly to the Subscription Event workflow type, but, being a start event, allows you to add up to four additional start triggers too.
To add this start event:
- Select the Subscribe to List button from the workflow start modal.
- Select if you’d like your workflow trigger to any lists (new and existing) or specific lists of your choosing.
- If you select the Specific Lists option, use the Select Lists drop-down menu to search for and check the boxes of the lists you want the trigger to apply to.
- If you’d like to only apply this to certain types of contacts, click the ‘Add additional criteria to filter contacts’ checkbox and specify which types of contacts you’d like to filter this start event by. You can add multiple filters by clicking the green plus button.
- When you’re finished, click Add Trigger.
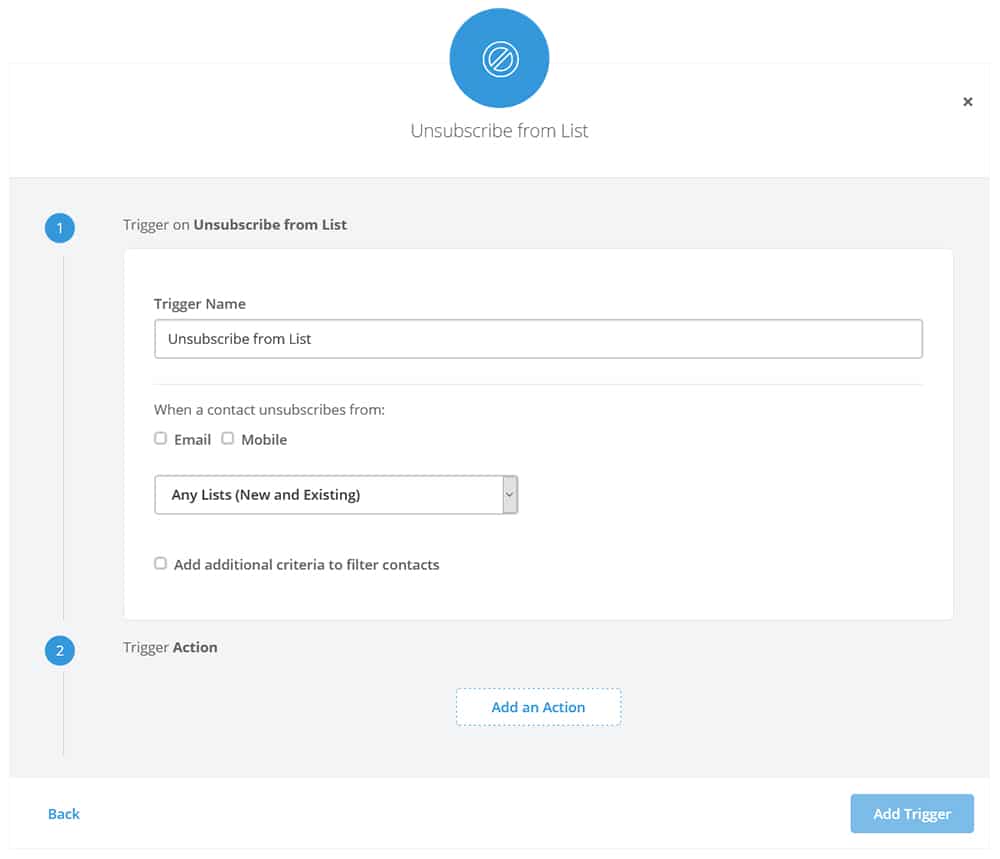
Start Event: Unsubscribe from List
This trigger adds contacts to the workflow when they unsubscribe from all lists or specific ones that you select. This can be useful for saying that you’re sorry to lose the contact and to thank them for their subscription. Additionally, you could use it to ask for feedback on why they’ve unsubscribed.
To add this start event:
- Select the Unsubscribe from List button from the Choose Trigger modal.
- Select whether you’d like the trigger to fire when a contact unsubscribes from email, mobile, or both.
- Use the drop-down to specify if you’d like the trigger to work when someone unsubscribes from all your new and existing lists, or if you’d like it to apply only to specific lists.
- If you choose specific lists, another drop-down list will appear. Here, select the specific lists you’d like the trigger to apply to.
- If you’d like to only apply this to certain types of contacts, click the ‘Add additional criteria to filter contacts’ checkbox and specify which types of contacts you’d like to filter this start event by. You can add multiple filters here.
- When you’re finished, click Add Trigger.
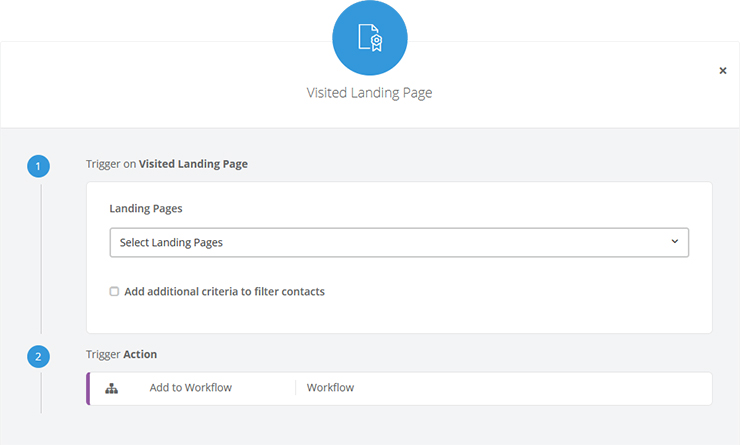
Start Event: Visited Landing Page
This start event adds a contact (not anonymous visitors) to a workflow if they’ve visited specific landing pages created on our platform.
To create this start event:
- Select the Visited Landing Page button from the workflow start modal.
- Choose the landing page/s from the drop-down that you’d like contacts to have visited.
- If you’d like to only apply this to certain types of contacts, click the ‘Add additional criteria to filter contacts’ checkbox and specify which types of contacts you’d like to filter this start event by. You can add multiple filters here by clicking the green plus button.
- When you’re finished, click Add Trigger.
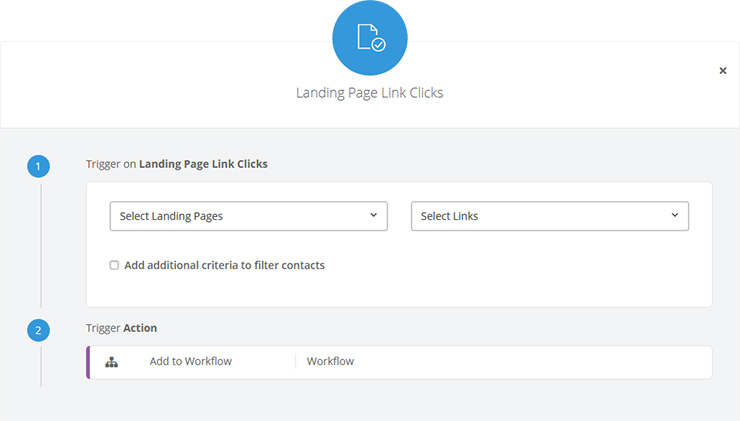
Start Event: Landing Page Link Clicks
This start event adds a contact (not anonymous visitors) to a workflow if they’ve clicked on a specific link in any of your landing pages created on our platform.
To create this start event:
- Select the Visited Landing Page button from the workflow start modal.
- Us the drop-down menu to choose the landing page/s that you’d like contacts to have clicked on.
- Specify the links you’d like the contacts to have clicked on.
- If you’d like to only apply this to certain types of contacts, click the ‘Add additional criteria to filter contacts’ checkbox and specify which types of contacts you’d like to filter this start event by. You can add multiple filters here by clicking the green plus button.
- When you’re finished, click Add Trigger.
Changing Your Start Trigger
There are two types of start triggers in workflows:
- Workflow types, which can only be triggered in one way
- Start Events, which allow you to add multiple start triggers
If you want to change from one Workflow Type (the first option) to another, you’ll have to delete it first. You can do this easily by hovering over the start trigger and clicking the trash icon.
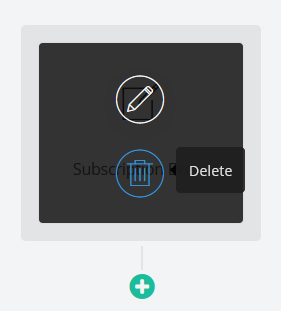
For start events, you can add up to five start triggers. You can delete any of these as you go by hovering over the trigger and clicking the trash icon.
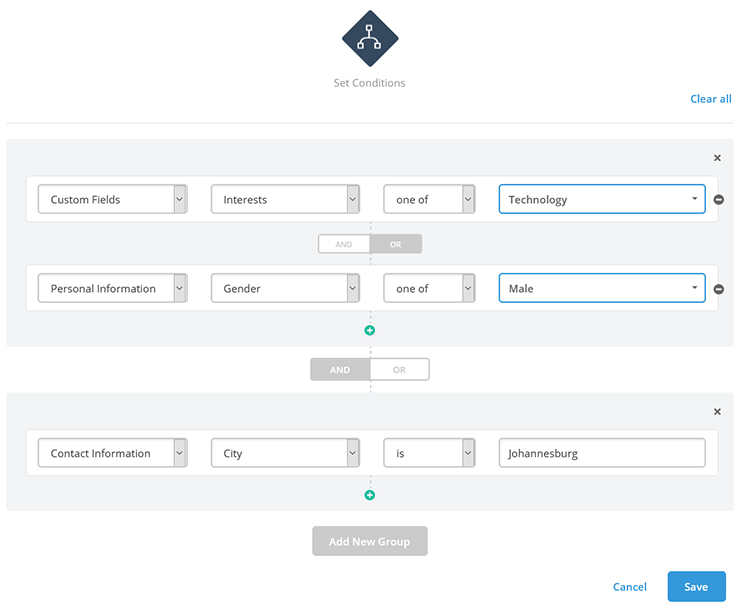
Setting Multiple Filters on Start Events
When using a start event, you can use multiple filters together, using AND / OR logic. This enables you to get very specific about which of your contacts flow through your workflow.
To do this, select the Add additional criteria to filter contacts check box inside your start event. Then do the following:
- Create and set up your first filter, then press the plus icon, or Add New Group button, to add the next one.
- You’ll see two options appear below the first filter: AND and OR. Select the one that suits your needs.
- Add as many filters as you need, then press Add Trigger to add the configured start event to your workflow.
AND / OR logic is used to combine multiple filter conditions to your trigger.
- AND will set off the trigger when a contact meets all your filter conditions.
- OR will set off the trigger when a contact meets one of your filter conditions.
See an example below of a configured start event with the OR condition selected.

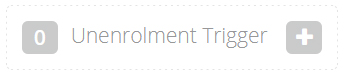
Workflow Unenrolment Triggers
Unenrolment triggers enable you to remove contacts from a workflow using up to five of the same Global Triggers you use to enrol them. To set up your unenrolment trigger, select the unenrolment trigger icon at the top of the workflow builder and follow the same steps as above.
Delays, Actions, and Conditions
Once your start trigger is confirmed, click on the + icon below it to select what the workflow should do next:
- Delay: wait for a specific time,
- Action: take an action, like sending an email, or
- Condition: apply a condition for the next node.
Delays
There are two types of delays that you can set between nodes:
- For a specific period of time: The number of months, weeks, days, or hours that you’d like to pass before the contact moves to the next node in your workflow.
- Until a Specific Date or Custom Date Field: This offers three options:
- Specific Date: The date on which you’d like the contact to move to the next node in your workflow.
- Custom Date Field: This allows you to send messages to a contact on, before, or after a contact’s own custom date – like their birthday.
- Data Set Date Field: If you’re using the Dynamic Data Sets workflow type, this enables you to set a delay in relation to a date in each data set.
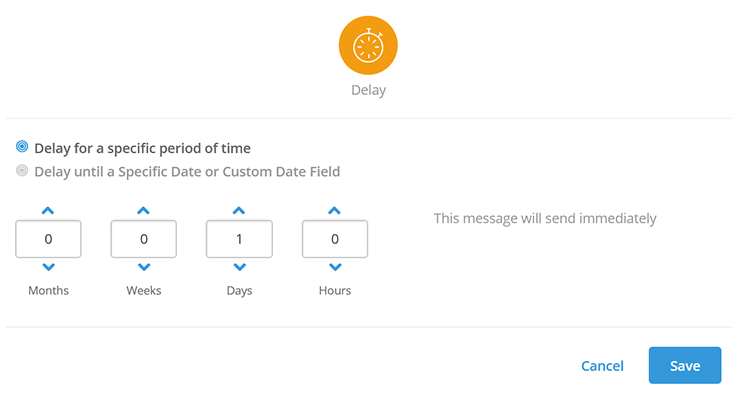
Note:
For specific dates, once the date is reached, the delay defaults to send immediately. So, anyone in the workflow will receive the next action directly after the previous one in the workflow branch. Please accommodate for this in your planning or adapt the workflow after this date has passed.
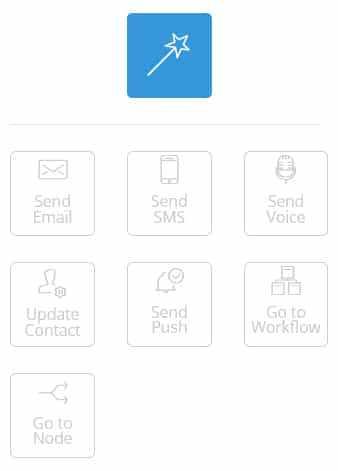
Actions
The action options for your workflow nodes are:
- Send Email: Create the email you want your contacts to receive at this point in their workflow journey.
- Send SMS: Create the SMS you want your contacts to receive at this point in their workflow journey.
- Send Voice: Upload a voice file that you want your contacts to hear via an automated phone call (text-to-speech not available in workflows).
- Update Contact: Update a custom field in your database, so you can use this information again later on.
- Send Push: Send a push notification to your push subscribers.
- Go to Workflow: Move your contacts to a particular node on another workflow.
- Go to Node: Move your contacts to another node in your workflow.
Read our Create an Email, Create an SMS, How to Send a Voice Broadcast, and How to Send a Bulk Push Notification pages for guidance on composing your message (note: you can’t use text-to-speech yet for voice broadcasts in workflows – you’ll need to upload an audio file).
While creating the workflow, you don’t have to compose the message immediately. Click Complete Later to position the empty node and continue building the rest of the workflow. Remember to come back and create them before setting your workflow live.
Go-to Node
Once your reader has completed a branch on your workflow, you can send them to another node using a go-to action. This allows you to continue the conversation on a separate but related topic relevant to their subscription. It also saves you from having to duplicate content you’ve already created on another branch.
The node that your subscriber goes to can be anywhere on your workflow, but we recommend connecting to a node on a different branch in your workflow to avoid sending the same content to your subscribers repeatedly.
To implement a go-to action:
- Click on the + under the last node in the branch that you want your reader to go from.
- Select the Action button and click on ‘Go to Node’. From here, you’ll see that all the nodes on your workflow have a pulsing dot below them.
- Select the node you’d like your readers to go to.
Once you’ve selected your go-to node, you’ll notice two things reflecting:
- A blue box below the node that you’re sending your reader from. This will have the node ID of the node they’ll go to in the workflow. To see each node’s ID, hover your cursor over your node of interest and the ID will pop up.
- A blue outline around the node that your readers will go to. The dot that was pulsing before you selected the node will be blue too.
These blue beacons make it easier for you to see, at a glance, where your go-to actions are on your workflow.
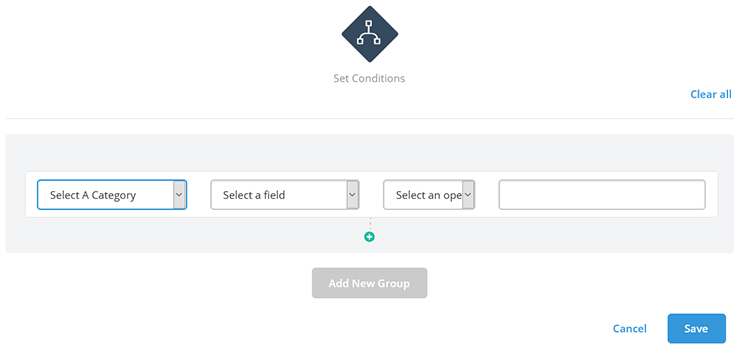
Conditions
The condition node allows you to set factors that determine how your subscribers flow through the workflow.
It requires you to:
- Select a Category: Set conditions according to existing subscriber information in one of the listed categories.
- Activity Type (available for Activity category only): If your condition is based on a contact’s activity, you can use this dropdown to select which channel (email, SMS, autoresponder, or voice) you’d like the condition to be based on.
- Select a Field: Select a specific field from that category as your main condition. Fields are related to the category you selected.
- Select Message (available for Activity category only): If your condition is based on a contact’s activity, this dropdown will enable you to select the exact message you’d like the condition to be based on.
- Select an Operator: The operator field determines how the condition should be fulfilled. Operators are:
- Is: Equal to
- Is Not: Not equal to
- Like: Is similar to
- Not Like: Is not similar to
- Greater Than: Is greater than a value (for dates)
- Less Than: Is less than a value (for dates)
- Between: Is between two sets of values (for dates)
- One of: Is one of the given values
- None of: Is none of the given values
- Select Activity (available for Activity category only): If your condition is based on a contact’s activity, this dropdown enables you to select the specific activity contacts have made on the specific message you’ve selected.
- Provide a Value: The final condition field is a text box. It allows you to either type in or select the determining value of the selected category and field.
Condition Example
| Category | Field | Operator | Value |
|---|---|---|---|
| Personal Information | Gender | One of | Male |
This means the workflow will check whether the contact’s gender is male. If true, they will flow down the ‘Yes’ path of the workflow, and if not true, they will flow down the ‘No’ path of the workflow.
Message Activity
The message activity condition has its own set of operators and values that trigger messages based on your contacts’ interaction with previous messages in the workflow.
To set up a message activity condition:
- Choose Message Activity from the conditions drop-down
- Choose the message you want the condition to apply to
- Select the activity you want to apply in this condition
Multiple Conditions
You can use multiple conditions on the same node to target very specific contacts. This allows you to specify if you want the contact to meet one condition and another, or one condition or another. Additionally, you can create groups of these and / or conditions for even richer targeting.
Note:
To delete a condition node, you must first delete any nodes below the one you wish to delete.
Branching
You can set branching within your workflow using conditions. This allows you to send your subscribers down different paths and allows them to experience more personalised journeys that match their interests, location, and other personal details.
Like the example above, you can hyper-personalise your emails and SMSs based on the subscriber information you have.
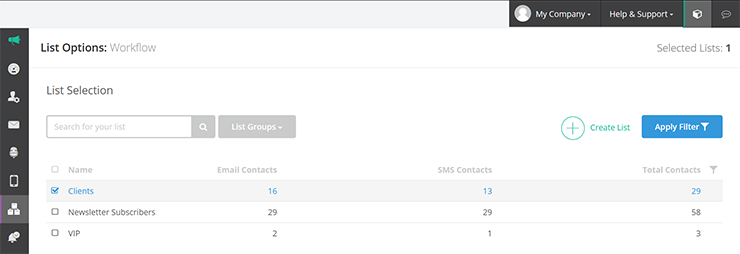
Step 3: List Selection
The next step for most workflows is list selection (this doesn’t come up if you’re using a start event, as those triggers are applied to all lists). It’s where you choose which contacts to send your workflow to.
Check the checkbox next to the list you want to use or create a new list. You can also segment your list with existing filters or create a new filter.
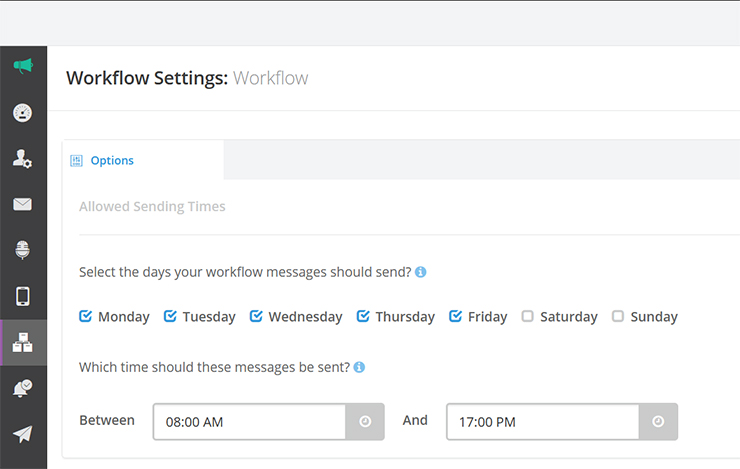
Step 4: Workflow Settings
Use these settings to regulate the workflow so messages are only sent on specific days, between specific times.
Step 5: Confirmation
On the confirmation page, double-check the settings for your workflow. You can go back and change the settings in any of the previous steps by clicking the pencil icon in the relevant section and navigating through the process again. When you’re satisfied that everything is right, click Launch. You can edit your workflow again from Workflow History.
If you edit a workflow that’s already been launched, the workflow will be paused.
This means that no new contacts will enter the workflow and the contacts that are in the workflow won’t receive any messages until you launch the workflow again. So, if you do edit a workflow, make sure you relaunch it as soon as possible to avoid disruption to the contacts’ experience.
Re-Creating a Workflow
To re-create an existing workflow:
- Hover over the workflows icon in the left-hand navigation and click History.
- Select the workflow that you’d like to re-create.
- Click on the Re-Create icon in the top-right corner of the viewing pane.

Workflow Examples
Now that you know how to create workflows in the system, here are some examples you can refer to, to help plan your own.
Example 1: Welcome Mailer
Our first example of a customer journey is when welcoming new subscribers.

- Set your workflow trigger to a Subscription Event.
- Add an action node to send an email. This will be your welcome email.
- Add a delay node and set a delay. In this example, we’re telling the system to wait three days between messages.
- Add an action node to send another email. In our example, this is an email explaining how it works.
- Add a delay node and set a delay.
- Add a condition node. Choose:
- Category: Activity
- Activity: Workflow email
- Select message: The previous email in the workflow
- Select activity: Has opened
- Your workflow will now branch into Yes and No.
- For the Yes branch, add an action node to send an email. In our example, this asks the contact for more details.
- For the No branch, add an action node to send an email. Select the How it Works email again but create a new email subject line.
- Add a delay node and set a delay.
- Add an action and select a Go to Node.
- Click on the Ask for more details email sent on the Yes path.
Example 2: Sign Up for a Demo
You can also use workflows to nurture leads, encouraging them to try out your product. Here’s an example of how you can do it.

- Set your workflow trigger on a Subscription Event.
- Add an action node to send an email. In our example, this email asks how you can help them and shares the products and services you can offer them.
- Add a delay node and set a delay. In this example, we tell the system to wait ten days between messages.
- Add an action node to send an email. In our example, this email offers them a demo by sharing a link to a subscription form on your demo-request page.
- Add a delay node and set a delay.
- Add a condition node. Choose:
- Category: Activity
- Activity: Workflow email
- Select message: The what-can-we-do-for-you email
- Select activity: Has clicked specific links
- Select options: Select the link/s you want the contact to have clicked
- Your workflow will now branch into Yes and No.
- For the Yes branch, add an action node to send an email. In our example, this email thanks the contact for requesting a demo.
- For the No branch, add an action node to send an email. In our example, this email sends testimonials and the request-a-demo link.
- Add a delay node and set a delay.
- Create a condition node. Choose:
- Category: Activity
- Activity: Workflow email
- Select message: The testimonials email
- Select activity: Has clicked specific links
- Select options: Select the link/s you want the contact to have clicked
- This branch will now branch into Yes and No.
- For the Yes branch, add an action and select a Go to Node. Select the email that thanks the contact for requesting a demo from the previous branch.
- For the No branch, create an action node to send an email. Our example email asks the subscriber to update their preferences.
Example 3: Re-engage Existing Customers
Workflows give you the power to reengage unengaged contacts by creating interesting emails and SMSs that encourage them to do business with you again (especially if you send discount vouchers and special offers). Here’s an example.

- Set your workflow trigger to Subscription Event (e.g.: add them to a segmented list of inactive subscribers).
- Add an action node to send an email. In our example, this invites the customer to return and offers a discount voucher.
- Add a delay node and set a delay. In this example, we’re telling the system to wait three days before the next node in the series.
- Add a condition node. Choose:
- Category: Activity
- Activity: Workflow email
- Select message: The previous discount email
- Select activity: Has clicked specific links
- Select options: Select the voucher link/s you want the contact to have clicked
- Your workflow will now branch into Yes and No.
- For the Yes branch, add an action node to send an email. In our example, this is a thank-you email that showcases further specials.
- For the No branch, add an action node to send an email. In our example, this email asks subscribers to update their subscription preferences.
Example 4: Thought Leadership
Workflows give you an easy way to establish yourself as an expert in your field. The topic suggestions for the emails in this workflow will depend on your industry and the type of content you want to share.

- Set your workflow trigger to Subscription Event, like someone signing up for a thought-leadership series.
- Add an action node to send an email. In our example, this is a welcome email.
- Add a delay node and set a delay. In this example, we’re telling the system to wait seven days before sending the next email in the series.
- Add an action node to send the next email.
- Add a delay node and set a delay.
- Continue for as many thought-leadership emails you have in your series.
- Create a condition node. Choose:
- Category: Activity
- Activity: Workflow email
- Select message: The previous email in the workflow
- Select activity: Has opened
- Your workflow will now branch into Yes and No.
- For the Yes branch, add an action node to send an email. In our example, this email invites contacts to sign up for your newsletter.
- For the No branch, add an action node to send an email. In our example, this email sends a summary of the email series with a link to sign up you’re your newsletter.
Example 5: Educational Series
If you run events or educational courses, you can set up a workflow to tell subscribers about upcoming events and help them onboard. Here’s an example using email and SMS (SMS requires you to have the contacts’ mobile numbers in your database):

- Set your workflow trigger on a Subscription Event, like when customers sign up on a subscription form.
- Add an action node to send an email. In our example, this email sets expectations for the course and the workflow.
- Add a delay node and set a delay. In this example, we’re telling the system to wait three days before sending the next email in the series.
- Add an action node to send an email. In our example, this is the course timetable and requirements with calendar attachments for important dates.
- Add a delay node and set a delay.
- Add an action node to send an SMS. In our example, this is a reminder SMS with the registration date and items they need to bring to the event.
Example 6: RSVP
You can use workflows to run RSVP campaigns for events and new-product launches. In this example, we consider a car manufacturer inviting people to attend a new-vehicle launch using email and SMS (this require you to have the contacts’ mobile numbers in your list).

- Set your workflow trigger on a Once-Off Start Date, like a few weeks before your launch event.
- Add an action node to send an email. In our example, this email teases the reader about your upcoming product.
- Add a delay node and set a delay. In this example, we’re telling the system to wait three days before sending the next email in the series.
- Add an action node to send an email. In our example, this email shares more information about your product.
- Add a delay node and set a delay.
- Add an action node to send an email. In our example, this email sends details about the product launch and a link to an RSVP form.
- Add a delay node and set a delay.
- Add a condition node. Choose:
- Category: Custom Fields
- Select a field: Find the field that shows if the contact has RSVP’d
- Select an operator: Is
- Value: Yes (or whatever value you’ve used to mark RSVP’s contacts)
- Your workflow will now branch into Yes and No.
- For the Yes branch, add a delay node and set a delay.
- Add an action node to send an SMS. In our example, this is an SMS reminder with the event details.
- For the No branch, add an action node to send an email. In our example, this sends a reminder with the RSVP link.
- Add a delay node and set a delay.
- Add another condition node. Choose:
- Category: Custom Fields
- Select a field: Find the field that shows if the contact has RSVP’d
- Select an operator: Is
- Value: Yes (or whatever value you’ve used to mark RSVP’s contacts)
- This branch will branch into Yes and No.
- For the Yes branch, add a delay node and set a delay.
- Add an action node to send an SMS. In our example, this is an SMS reminder with the event details.
- For the No branch, add a delay node and set a delay. In our example, this date will be after the event.
- Add an action node to send an email. In our example, this email tells subscribers about the product launch they missed and invites them to try out the product anyway.
- For the Yes branch, add a delay node and set a delay.
- For the Yes branch, add a delay node and set a delay.
Example 7: Birthday Email
You can set up a workflow to send annual birthday messages to your subscribers, keeping them engaged. Here’s an example using email and SMS (SMS requires you to have contact mobile numbers in your list):

- Set your workflow trigger to Anniversary.
- Add an action node to send a birthday email. Consider including a discount voucher.
- Add a delay node and set a delay. In this example, we’re telling the system to wait six hours before the next node in the series.
- Add a condition node. Choose:
- Category: Activity
- Activity: Workflow email
- Select message: The birthday email in the workflow
- Select activity: Has opened
- Your workflow will now branch into Yes and No.
- For the Yes branch, take no further action.
- For the No branch, send a reminder SMS with the voucher in it.
Workflows offer great benefits to your customer experience, so while they may take some effort to set up properly, they are well worth the investment.