
Overview
This page will walk you through each step in the process of creating a standard email. We start with choosing the email composition tool that most suits you, walk through choosing and customising a template, entering email details, creating the email, and choosing who to send it to.
How to Create an Email
To compose an email, hover over the envelope icon in the left-hand navigation bar and click Create Email.
Full Tutorial Video
Step 1: Choose a Composition Method & Template
Tutorial Video
To choose a composition style, click on the Builder, Classic, or Coder icons on this page (the Builder, our drag-and-drop email composer, is selected by default). You can also import a template from a URL or upload one from a Zip file by clicking on the links in the top right of the screen.
Create an Email Using the Builder
In the rest of this guide, we’ll explain the Builder method of composition. The other methods include:
- Classic: A standard What You See Is What You Get (WYSIWYG) interface.
- Coder: Advanced code editor to upload or edit email templates using HTML or CSS. This will send your newsletter exactly as you provide it.
- Import from URL: Import a newsletter directly from a website or CMS.
- Upload from ZIP: Upload a ZIP file straight from your computer.
Download instructions for these composition methods.
You can also choose an email template from this screen. Templates have predefined style sheets and formats and are designed to be used as-is, so choose one that’s best suited to the layout of your content. Any previously uploaded templates can be found on this step too. If you have a specific layout in mind, you can also customise a blank template.
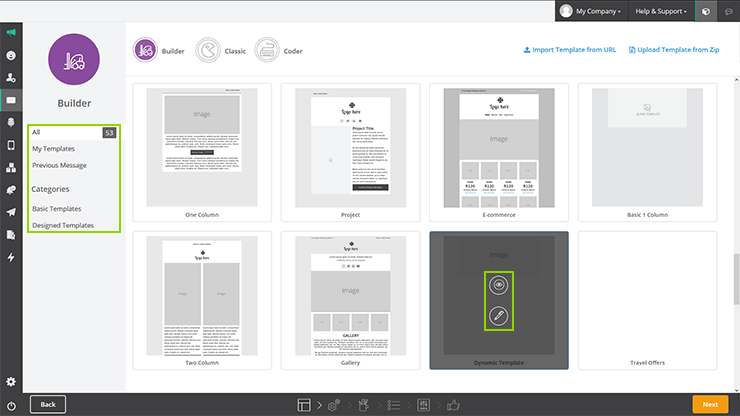
To choose a template:
- Scroll through the templates to find one that you like or navigate through the categories to find something specific.
- Hover over the template thumbnail that you’re interested in. Here, you can either click on the eye icon to preview it or click on the pen icon (or anywhere on the thumbnail) to proceed to the next step.
Step 2: Message Properties
Tutorial Video
Message properties are the basic details that differentiate this email from all the others you will create. These include:
| Property | Description |
|---|---|
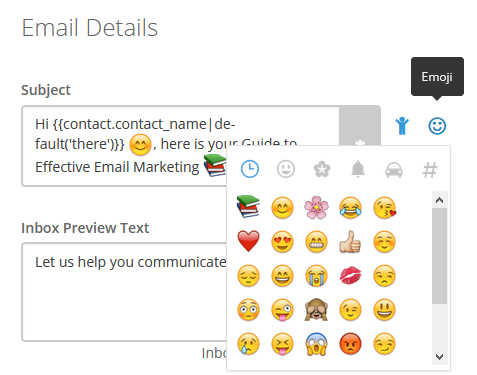
| Subject | The subject line your subscribers see when the mail arrives in their inbox. This will likely determine if your subscribers open your email. |
| Inbox Preview Text | A short summary of the email following the subject line when viewed in the inbox. The average email client displays about 75 characters. |
| Description | If you want to add a description of your email, for your own records, you can enter it here. This also helps differentiate your mails if you’re sending multiple emails with the same subject line. |
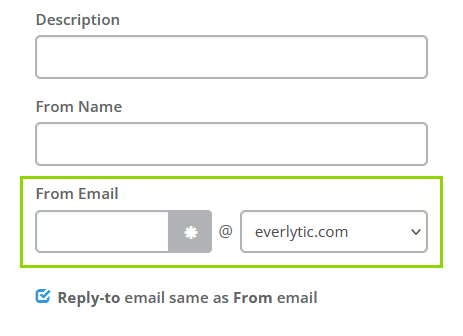
| From Name | The name you’d like subscribers to see your message is received from when your message lands in their inbox. |
| From Email | This is what your subscribers see as the ‘From’ email address in their inbox. In this section of the properties page, you can intuitively view and select your verified email domains using our domain dropdown bar (see image below). To personalise your from email addresses, click in the from address text box, select the personalisation icon, and find the relevant custom field. This will automatically disable the domain dropdown bar to avoid adding an additional domain to your from email address. |
Emojis
Emojis are small digital images or icons used to express an idea or emotion – you can use the emoji buttons (smiley face) next to the subject line and preview text to include these in here too. Most email clients support emojis, but we recommend still using a subject line that makes sense without the emoji in case.
What it will look like:
Standard Campaign
Adding your email to a standard campaign will allow you to compare statistics on similar messages after sending. You can’t add a message to a campaign after this step. To do this:
- Check the Standard Campaign checkbox
- Choose or create the campaign you want to group this email with – e.g.: Black Friday Promotions
Step 3: Message Composition
Tutorial Video
As covered earlier, this next tutorial covers the composition process for the Email Builder. Instructions for all other composition options can be found here.
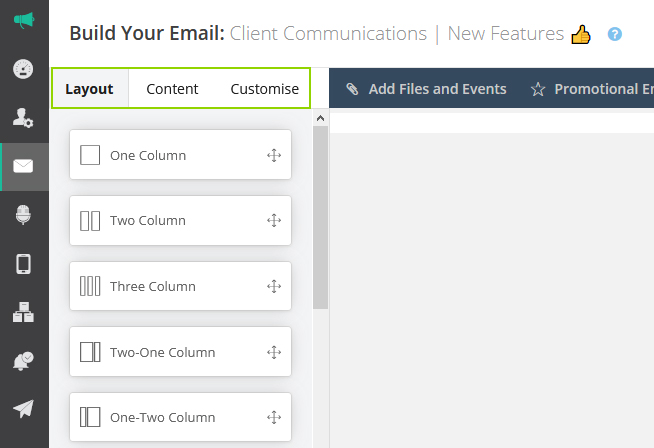
Once you’ve reached the Builder step, you’ll see the left-hand toolbar is split into three tabs:
- Layout: This is where you can create the framework of your email, including columns, sections, and social media icons.
- Content: Use this to drag content placeholders into your email.
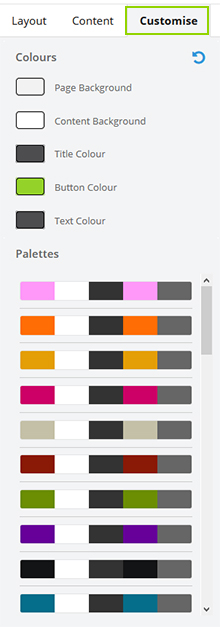
- Customise: This is where you can edit the colours of your email background, buttons and other content.
Layout
Choose from a one, two, three or four-column section that you can drag into your email. Each of these sections are editable and can be moved around by hovering over the block and selecting from the icons on the top corners.
- Move the block around (arrow icon)
- Open the editing panel (pen icon)
- Delete the block (bin icon)
If you want to replace a section, delete it first and then drop a new content section onto the template. Make sure you keep a backup of the content as it’s not possible to undo a deletion.
You can also drag left-, right-, or centre-aligned social icons into anywhere in your email.

Product Column
If you’ve connected your ecommerce store to the platform, you can pull products into your emails from here. To do this:
- Pull a product column into your email where you’d like the store products to be displayed.
- Hover over the block placeholder and click on the Edit products button. This will open the product column editor.
- Click Choose Products. This will bring up the Choose a Product modal.
- Select the store that you’d like to pull the product info from using the dropdown menu.
- In the next modal, you can search for the product you want by name or SKU using the search bar and filter by category and availability. This will bring up a selection of products that match your search. You can then sort the products so the one you want is easier to find. Select the product you want and click Save.

Content Over Background Images
To add any content (like HTML text, a button, divider, etc.) over a background image, first add a background image:
- Drag one of the sections, with the relevant columns, into your preferred location on your email.
- Click on the pencil icon in the top-right corner of the section placeholder.
- Upload your chosen image or specify the URL of the image you’d like to use. Customise your padding as preferred and click the ‘Repeat’ checkbox to repeat the image throughout that section of the mail.
- Click the back button to exit background editing.
Then, to add content over the image:
- Go to the Content tab.
- Drag any of the options from the content tab over your image and edit as usual.
Important Notice
- Mobile view crops the image on the left-and-right-hand sides – make sure the centre of your image is the focal point to avoid losing any valuable imagery on mobile views.
- This feature works on supported Outlook email clients and other email clients that support background images.
Editing the Background Colour
To edit the background colour of a section in your email:
- Click on the pencil icon in your chosen section,
- Select the Row Background Colour block, and
- Choose the colour you want.
If you know the hex or RGB code for your brand’s colour, type it into the # text box in the colour-picker palette.
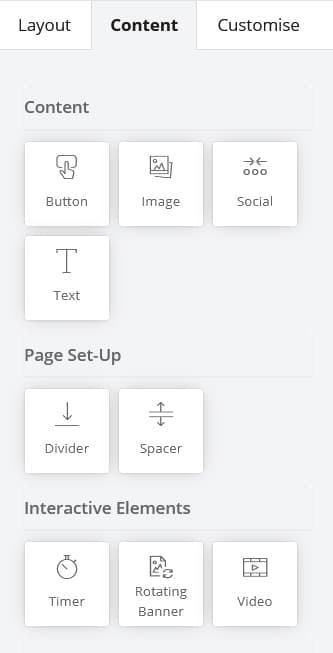
Content
On the Content tab, select from any of the below content sections and drag it into your email.
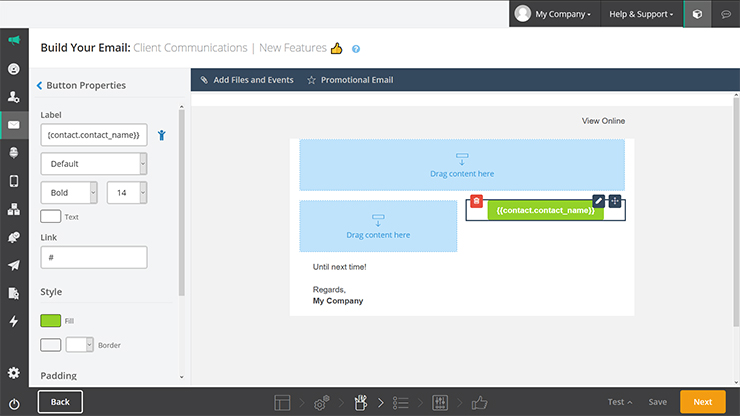
Buttons
Once you’ve dropped a button into your email, you can personalise it (e.g.: with the person’s name) and edit its colours, label, alignment, and link. Click the button to open its properties and click on the editing icon. Set the button properties in the panel on the left.
Buttons on older templates may still use the Customise tab to change the button colour.
Buttons with Rounded Corners
1. Add the button to your template.

2. Select the Edit feature.

3. The Button Properties will now be displayed on the left.

4. Select the Corner Radius scale to “round” the button to your preference.

Buttons to Pre-Populated Forms
If you use a button to direct to the URL of a subscription form that you’ve created in our platform, you can set it so that any data you already have on the contact is already pre-populated in the form when they click through. This makes the form-completion process quicker and easier for them.
To do this:
- Drag a button into your email.
- Hover over the button and click the pencil icon to edit the button properties.
- Hover over the text box for the link – you’ll see a personalisation icon pop up on the side.
- Click the personalisation icon. A personalisation modal will appear on your screen.
- Click on Form.
- Select the form you want the button to link to.
- Click Submit (no need to create a fallback).
Edit all other button properties as usual.
Images
To insert images, you can either upload them from your computer / server, or you can get them directly from a URL.
To upload an image:
- Drop an Image block into the template.
- Select the pencil icon in the image block.
- Select upload image in the properties section on the left.
- Click upload.
- Click browse.
- Find the image you want to use.
- Double-click on the image.
- The image file will be added to your email.
Hover over the image and click on the Edit Image (pencil icon) button to:
- Change the Alt Text to ensure that people know what the image is about, even if it doesn’t load on their end.
- Specify a URL that recipients will go to when they click on the image.
- Align your image to the left, right, or centre of your email.
To use an image URL:
- Drop an Image block onto the template.
- Select the edit icon in the image block.
- In the text box, insert the URL of the image you want to use.
- Click Save.

Social
Pull social icons into your email by clicking on the social button and dragging it into the relevant section in your email. Once positioned, hover over the social icons in your email and click the pencil icon. This will open the editing panel on the left where you can add icons, titles, and links to the following social platforms:
- YouTube
- A custom platform
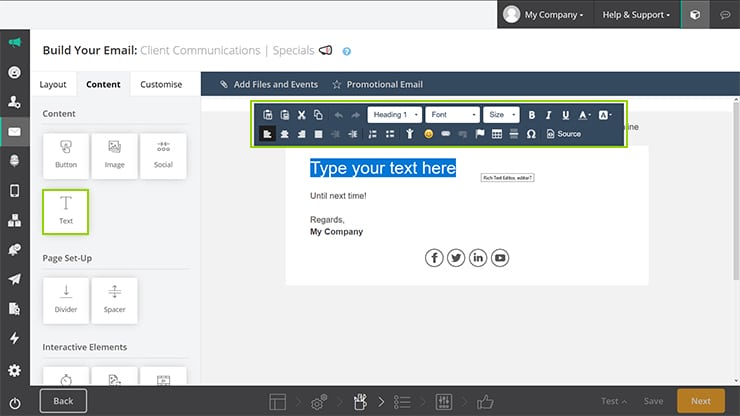
Text
You can also pull a text-only block into your email. To edit this text, hover over the block and click the pen icon. Now you can add your text. With the action bar popup, you can also change the font, add bullets, add tables, add links, and more.
There are three types of links you can use in your email text:
- URL: A link to a webpage
- Link to anchor in the text: Links to text in the email to get to it faster.
- Email: Links to an email address where the contact can send an email. Remember to add ‘mailto:’ before the email address.
If you link to a pre-built form created in our platform, the personalisation link pre-populates the form with the subscriber’s personal data. This makes the form-completion process quicker and easier for them.
Dividers
Dividers add a line into your email to separate different sections of content.
Spacers
The spacer tool allows you to add a space in between different sections of your email. It’s dynamic too, so just drag the resizing icon at the bottom to get it to the right size.
Timers
Countdown timers add excitement and urgency to your campaigns. To put one in your email:
- Select the Countdown icon and drag it into place in your email.
- Click on the pencil icon in the top-right corner of the countdown placeholder.
- In the left-hand Countdown Properties tab, specify properties like:
- The end date that your timer is counting down to
- The font, size, colour and spacing of the numbers and timer labels
- The language you’d like to use in place of days, hours, minutes, and seconds (customise to your language of choice)
- The background colour and height
Rotating Banners
You can add a rotating banner, consisting of three images, to your email.
To use it in your email:
- Click on the Rotating Banner icon and drag it into position in your email.
- Click the pencil icon on the banner placeholder to add up to three rotating images and a link that the images will lead to if readers click on it.
Note: Remember to save your banner when you’re done.
Video Preview Images
To share a video-preview image in an email, which links to a video in YouTube or Vimeo:
- Click on the Video icon and drag it into position in your email.
- Click the pencil icon on the video placeholder.
- Provide the YouTube or Vimeo link that you’d like the video preview image to link to. The preview image will generate automatically.
If you want to use a custom image for the preview image:
- Click the pencil icon on the video placeholder.
- Click on Replace Image under the preview image.
- Double click on the image you want to use or upload a new one.
Customise
Click the Customise tab to adjust the colours for specific elements in your email, like backgrounds, buttons, and header text. You can also choose from a range of pre-existing colour palettes to find a combination that works for you and your brand.
Attachments (Not available on Basic package)
To add an attachment to your email:
- Click Add Attachment on the top bar.
- Click Browse Computer to find and upload the file from your computer.
- Click Attach once the file is uploaded. Attachments are added to the bottom of the email, below the footer.
You can also create an event invitation attachment from this page.
Dynamic Attachments
Dynamic attachments enable you to personalise your attachments to the contact receiving the email (e.g.: sending separate invoices to each client every month). Instead of sending individual mails with their unique invoices attached to each one, you can send a single mail to all your contacts, and each person will receive their unique invoice.
Gmail Promotional Emails
Gmail’s Promotions tab is a marketer’s best friend. Not only does it decrease your email’s chances of going to junk mail, but with a focussed tab just for promotions, it attracts an engaged audience.
Additionally, it enables you to add extra design and content elements to the email that are viewable from the inbox. These include customised images, your company logo, and promotion details like discounts, deal expiry dates, and promo codes.
Read more about Gmail’s Promotions tab
To send your email to the Gmail promotions tab:
- Click on the Promotional Email button in the top bar navigation in the Builder.
- In the Gmail Promotions popup (the preview in the platform is what mobile viewers will see), you can:
-
- Enable the Promotional Email toggle.
- Provide the URL to your company logo icon (the image is small, so icons work better than full logos).
- Select the checkbox to include a discount description, code, and code expiry date.
- Select the checkbox to add a promotional image. Click Save.
- The promotional email will now be set.

Adding Promotional Cards to Your Emails
Add visual appeal to your emails with promotional cards containing product information. To add these, do the following:
- Tick the Include Promotional Cards checkbox.
- Next, 2 promotional card input forms will pop up. If you require an additional card, then click on Add Product Card (below the bottom card).
- In the Image URL field, enter your desired image link (e.g., server or website link). This is a required field.
- Now, add your product page link to the Link URL. This is also a required field.
Notes regarding images:
- Image links that pull through from a server (200 status code) or cache from local disk (304 status code) will pull into the promotional cards.
- Image aspect ratios supported by this feature are 4:5, 1:1, 1.91:1.
- For product carousels, each image must have a unique link and use the same aspect ratio.
- Important: Avoid using server links that are rerouted (e.g., via 302 redirect). Rerouted links will not pull into the promotional card and the associated images will fail to display in the promotions tab when the email is sent.
- Lastly, add in the optional fields, which include:
- Headline: A general product description
- Price Amount: The original price of the product without discounts applied.
- Discount Amount: This amount will automatically subtract from your Price Amount and a strikethrough version of the original price will appear on the card – just to the right of the adjusted price.
- Currency: To add currency symbols to the price displayed in your card, input the relevant currency acronym or abbreviation into the Currency tab, e.g., USD, EUR, GBP, and ZAR.
Dynamic Content
Dynamic content allows you to customise what different segments of your audience see in your email, displaying or hiding sections of content based on your contacts’ data.
To customise which segments of your audience see a section of your email:
- Hover over the full layout section of the section you want. This will be shown when you hover just to the right of your content section. You can pull in a new layout section from the layout tab too.
- Click the Add dynamic statement button on the top-right of the box with the icon that has two arrows coming off a dot.
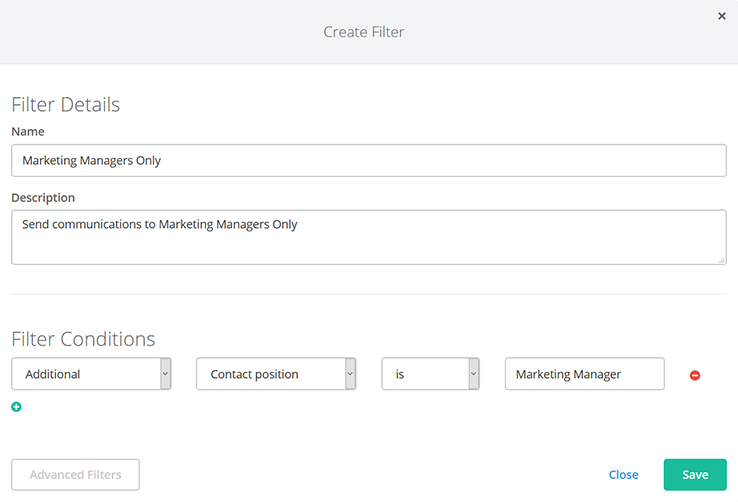
- A window will pop up allowing you to set the conditions. Select the data category, field, condition, and value of the condition. You can also add more conditions by clicking the “+” sign.
- Click Save. The symbol for dynamic statements will turn orange on the layout column to show that a condition has been set.
Testing
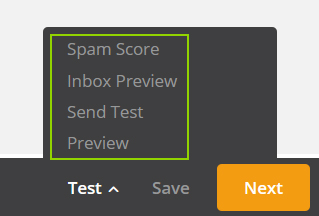
Once you’ve built your email, you can preview it, send a test, or check its spam score using the Test menu in the bottom right of the screen.
- Preview: Displays the email, with your footer included. This basic HTML preview gives you an idea of what your email may look like to your readers.
- Send Test: Sends a test or a selection of tests of your email to one or more email addresses to preview any layout or customisation settings in your email.
- Inbox Preview: The platform renders what your email will look like in common email and mobile clients. This is more thorough than the basic compatibility test and takes longer to run.
- Spam Testing: Here, the system will automatically evaluate the different elements in your email that contribute to a high spam score.
When you’re happy to proceed to the next step, click Next.
When doing an inbox preview test, the email platforms you can preview your email in include:
Mobile Clients
- iPad Pro (11-in)
- iPad Pro (12.9-in)
- iPhone 11
- iPhone 11
- iPhone 11
- iPhone 11
- iPhone 11 Pro
- iPhone 11 Pro
- iPhone 11 Pro Max
- iPhone 12
- iPhone 12
- iPhone 12 Pro Max
- iPhone 13
- iPhone 13
- iPhone 13 Pro Max
- iPhone 7 Outlook
- iPhone SE 2nd Gen
- iPhone SE 2nd Gen
- iPhone XR
- iPhone XR
- Samsung Mail
Web Clients
- AOL Chrome
- AOL Edge
- AOL Firefox
- Google Workspace Chrome
- Google Workspace Firefox
- Gmail Chrome
- Gmail Edge
- Gmail Firefox
- GMX Edge
- GMX Firefox
- Office 365 Chrome
- Office 365 Edge
- Office 365 Firefox
- Outlook.com Chrome
- Outlook.com Edge
- Outlook.com Firefox
- Outlook.com Chrome
- Outlook.com Edge
- Outlook.com Firefox
- Yahoo Chrome
- Yahoo Edge
- Yahoo Firefox
Application Clients
- Apple Mail 13
- Apple Mail 13
- Apple Mail 15
- Apple Mail 15
- Outlook Office 365
- Outlook Office 365
- Outlook Office 365
- Outlook Office 365
- Outlook 2013
- Outlook 2016
- Outlook 2016 (120 dpi)
- Outlook 2019
- Outlook 2019 (120 dpi)
Step 4: Select Lists
Tutorial Video
In this step, you can define which lists to send your message to, as well as segment your lists for deeper reporting.
To do this:
- Check the checkbox next to a list’s name to select it. You can choose multiple lists.
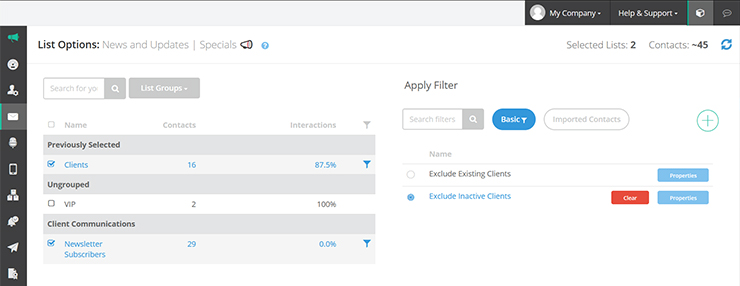
- To target a more specific audience within these lists, click on the Apply Filter button. Here, you can search for and select a filter you’ve created before, you can filter according to a specific list that you’ve imported into the system, or you can create a filter by clicking on the plus icon.
You may find that the total number of recipients is lower than the total number of contacts in your selected lists. This can be caused by two things:
- A single contact may exist in more than one list.
- You may have SMS and email contacts in one list. If you’re composing an SMS, the email contacts won’t be counted as recipients.
When you’re comfortable with the lists and filters you’ve selected, click Next.
Step 5: Delivery Options
Tutorial Video
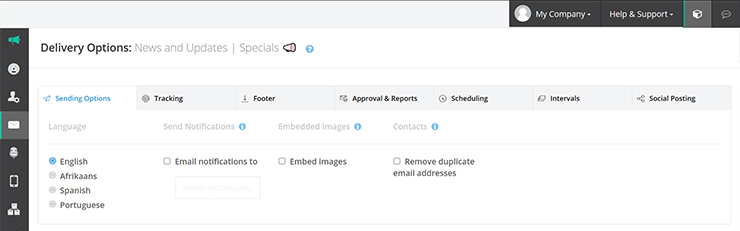
The delivery options tell our platform what to do with your email when it sends it, and what to do with the statistics it gathers afterwards. Toggle between the tabs to specify the details of your email.
Sending Options
On this tab, you can customise:
- Which email address the platform must send notifications to, if needed.
- The Embed Images option has been disabled to improve your email delivery and increase your emails’ chances of getting to your subscribers’ inboxes.
- To remove duplicate email addresses from your mailing list to avoid sending the same email to the same contact multiple times.
Tracking Options
Google Analytics Tracking
Here, you can connect our platform to your Google Analytics account, if you have one – this enables you to monitor on Google Analytics, which clients have clicked through to your site from this email. The platform will automatically use the email details as the Google Analytics references.
If you’ve specified a campaign that this email will be a part of in the email properties step, this campaign name will show in the Campaign Tag text box. If you haven’t selected a campaign, the platform will use the email subject line instead. If you want to change the reference, you can type one into the textbox.
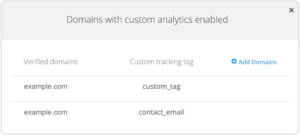
You’ll need to connect your email domain with your Google Analytics account for this to work. Check if your domain is connected by clicking View Domains. If your domain isn’t connected, you can do so now by clicking Add Domains. Read instructions here.
Enable Custom Google Analytics Tags on Email
To enable custom tracking tags on email:
- Navigate to the Tracking section under Delivery Options.
- Open the Tracking dashboard, then select the Custom Tracking Tag radio button at the bottom left.
- At this point you can enter the value you want to associate with the custom tracking tag in the field provided. You will only be able to add values to tags that have been associated with your domain (see Setting Up Google Analytics for a Specific Domain). You can find the list of tags associated with your domain by clicking View Domains & Tags.
4. Next, click Save.
Note: When sending emails that contain links with your verified domain in them, the custom tracking tag you’ve specified will be appended to these links, and they will resemble the following example link as they appear in the recipient’s browser window:
“http://www.domain.com/page.htm?custom_tag=this_is_a_custom_value”
Tracking Opens & Link Clicks
Our platform tracks opens and clicks on your emails by default. If you don’t want to monitor these metrics, you can uncheck their relevant checkboxes on this page. Please note that to track links, your URLs must contain https://. You can go back to the Builder to check your links for this from here if you need to.
Attachment Tracking
If you’ve loaded attachments to your email, a Track attachments checkbox will appear here too. When it’s selected, the attachment will appear on the footer. When it’s off, it appears as a normal attachment in the email.

Interest-Based Tagging
Interest-based tagging uses natural language processing, a form of machine learning, to categorise the content your contacts are clicking on within your emails, and tags them with it in your lists. You can use this interest data to create filters for your lists, so you can get even more granular with segmentation and targeting.

Footer
In this tab, you can manage elements in your email footer.
- The Unsubscribe link is required by law. You must have one in every single email you send.
- Below this, you may see a drop-down list (only available to some clients). This enables you to select the size of the footer you want to include in the email. The Standard option is a bit shorter, while the Extra option includes your company address.
- You can add forwarding links to your footer too. These links will track when your contacts forward your emails to their friends using these links.
- You can add links to your social media pages to the email footer by checking the social link you want to add.

Approval & Reports
If you need to get approval for your message, you can enter the email addresses to request approval from here. To do this:
- Check the Get approval checkbox.
- Enter the names and email addresses of the people you need to get approval from in the text boxes provided.
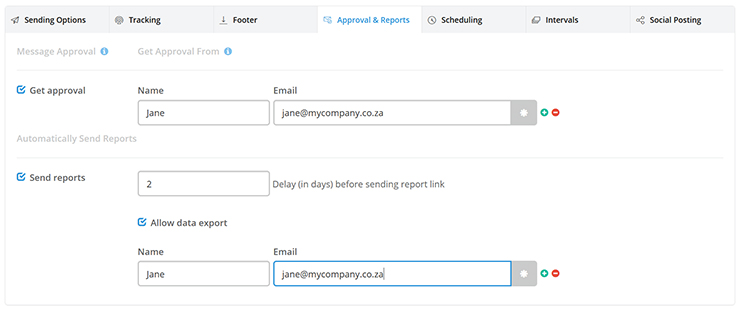
- Check the Send Reports checkbox if you want to automatically send reports on the email’s performance.
- Set a period to wait, in days, before the platform sends the email. It’s worth doing some research here to see when your contacts interact with your emails. It’s probably safe to set this around three to five days after send, but your results will vary depending on your audience.
- Choose if you’d like to allow your recipient to export data from your reports and enter their email address. Warning: This will give the recipient access to your contact list data.
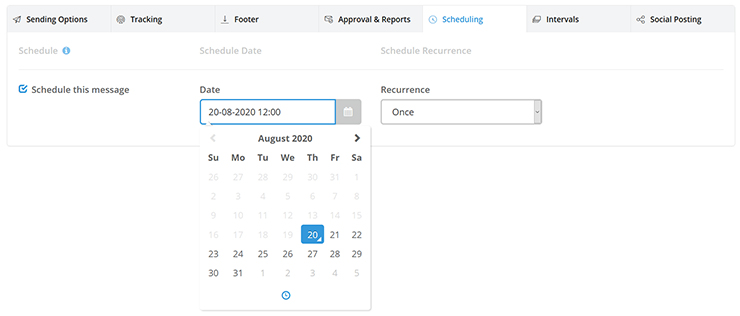
Scheduling
In the Scheduling tab you can set a future sending date, time, and recurrence for your email. Recurrence is useful for reminder emails, or anniversary emails. Birthday emails fall into this category.
To do this:
- Check the checkbox next to Schedule this message.
- Set a specific date and time to send your message.
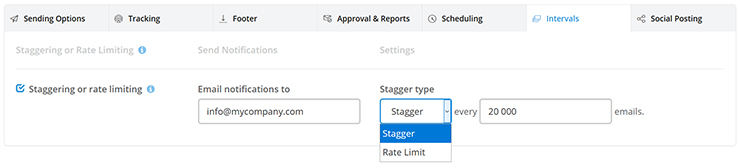
Intervals
Set up staggering and rate limiting if you’re sending to a large list (20,000 contacts and up). To set this up:
- Check the checkbox and select the option you want from the drop down.
- Staggering: Sets the platform to pause after sending a specific number of emails. You’ll need to re-start the sending process manually after each pause if you choose this option.
- Rate limiting: Pauses the send after a certain number of emails have been sent.
- Set the amount of time to wait between each batch.
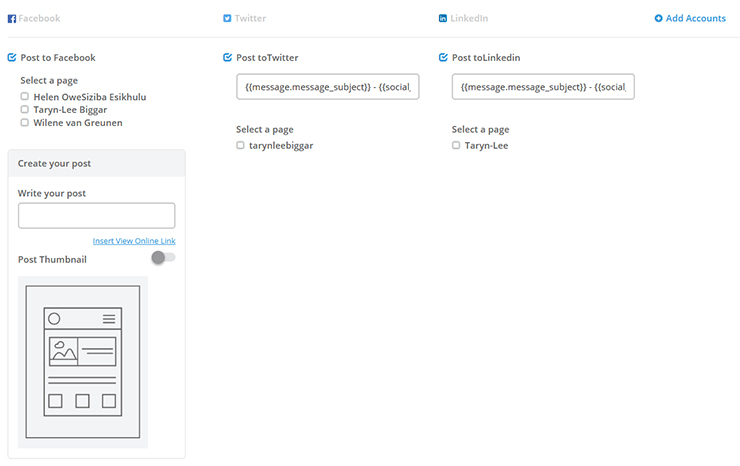
Social Posting
In the Social Posting section, you can publish your emails on social media.
- If you’ve already added your social media accounts, you can select them here. Alternatively, click Add Accounts and work through the wizard to integrate a social media account.
We currently support Facebook and LinkedIn.
- Facebook:
- Select the Facebook page you’d like to post to if you’ve added more than one.
- Write the text for your post.
- Click Insert View Online Link to add in a personalised link that followers can use to view a version of your email online.
- Unselect the Post Thumbnail knob if you’d prefer not to include a thumbnail.
- LinkedIn:
- Add the text for the LinkedIn post that you’d like to include.
- Select the LinkedIn profile that you’d like to post to if you’ve added more than one.
Once you’ve finalised your delivery options, click Next.
Step 6: Confirm & Send
Tutorial Video
The summary and sending options page shows a preview of the message, with the options you’ve selected, as well as the number of contacts the message will be sent to. You can view all message details like:
- Message preview
- Message properties
- Attachment details
- Lists selected
- Number of contacts the message will be sent to
- Sending options selected
- Tracking details
- Reporting options
- Social settings
- Footer selected
You can also get a preview of your email, check the SPAM score, and see an Inbox preview one last time.
If you need to return to previous steps of composition to edit your message and its properties, click the Back button or the pencil icon in the section you’d like to edit.
When you’re ready, click Send and the system will start sending your message or will schedule it to send on the date and time that you’ve set it to. To locate scheduled messages that haven’t been sent yet, hover over the email icon in the left-hand navigation bar and click History.
A warning message will appear in the preview window if your message size is above 350KB.
To reduce your email size, try:
• Reducing the size of your attachments
• Remove any embedded media from your email
• Disabling the Grammarly plugin on your system
If the message requires approval, click Await Approval. Once the message is approved, it will automatically start sending. If the approval is rejected, you can edit the message from the Saved messages area on the History page. Keep an eye on the Email History dashboard to see if your email was accepted or rejected.
Pause Email Sending
Once you’ve clicked Send, your message will immediately start sending. If you need to pause the message or cancel it, you can do this on the History page too. However, some emails will already have been sent before you pause or cancel.